Piñata Boy
  • Home
  • Gallery
    • Alien
    • Jaguar
    • Princess Ducky
    • Alien Planet
    • Jimmy Kimmel Live
    • Rainbow Zebra
    • Demon Smiley
    • Medusa
    • Santa Smiley
    • Dolphin
    • Neopets – Feepit
    • Shark
    • Football
    • Neopets – Shoyru
    • Smaug
    • Ghost and Bat
    • Parrot
    • Stegosaurus
    • Green Dragon
    • Pigasus
    • Tarantula
    • Heart
    • Pirates of the Caribbean
    • Tropical Fish
    • Hello Kitty
    • Pokeball
    • Warlord of Nibblecheese
    • Jack-o-Lantern
    • Porcupine Pufferfish
    • Coloring Pages!
    • Jill-o-Lantern
  • Make Your Own
    • Before you start
    • Adding the hanging hook
    • Smashing your piñata
    • How to make a piñata
    • Decorating your piñata
    • Storing your piñata
    • Working with balloons
    • Decorating with crepe paper
    • Simple Piñatas
    • Working with cardboard
    • Cutting the candy opening
    • Step-by-step instructions
    • Working with papier mâché
    • Making a piñata stick
    • Ask a Question
  • Show Us Yours
  • Blog
  • About

Cutting the candy opening

(click photos to see enlarged)

I usually add the candy to the piñata only after the decorating is complete; in fact, I don’t even make the door until then.  The easiest way to make a candy door is to cut three sides of a rectangle into the piñata somewhere near the top.  I do this with an ordinary steak knife or pocket knife.  If you’re decorating your piñata with snipped crepe paper, you can close the door when you’re done and it will disappear in the crepe paper.

Here’s how we cut the candy door into the Jill-o’-lantern piñata.

Since this piñata has a decorative vine strung across the top, the choice of where to put the door is obvious.  I’ll move the vine aside, cut the candy door, and then lay the vine back down to help hide the door when I’m finished.

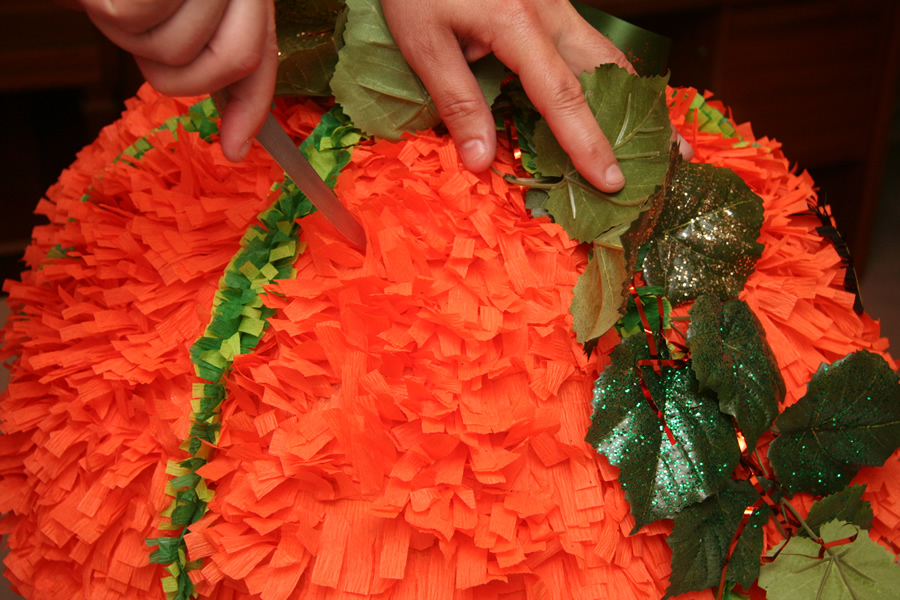
I started by making a vertical cut in the piñata about two inches long.  I use an ordinary steak knife or pocket knife for this, the sharper the better.  I made sure the door was at least a couple inches away from the hanging hook for two reasons:  1) I don’t want to weaken the piñata close to the hanging point, and 2) the way I make hooks for large piñatas like this one, there’s a cardboard shield behind it that would be difficult to cut through.

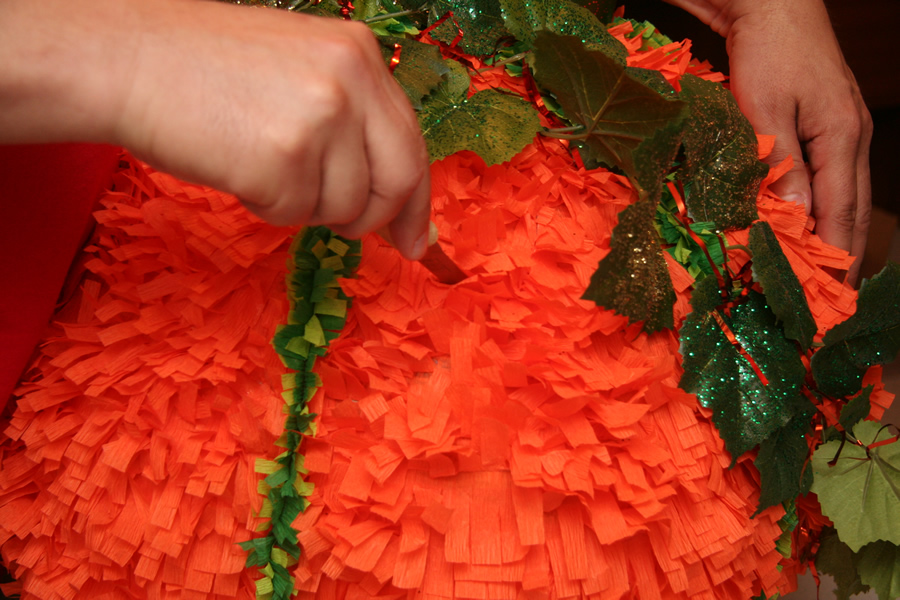
With the first cut finished, I turned the knife and cut horizontally about an inch and a half or two inches long.  After this I made another vertical cut for the third side of the rectangle.

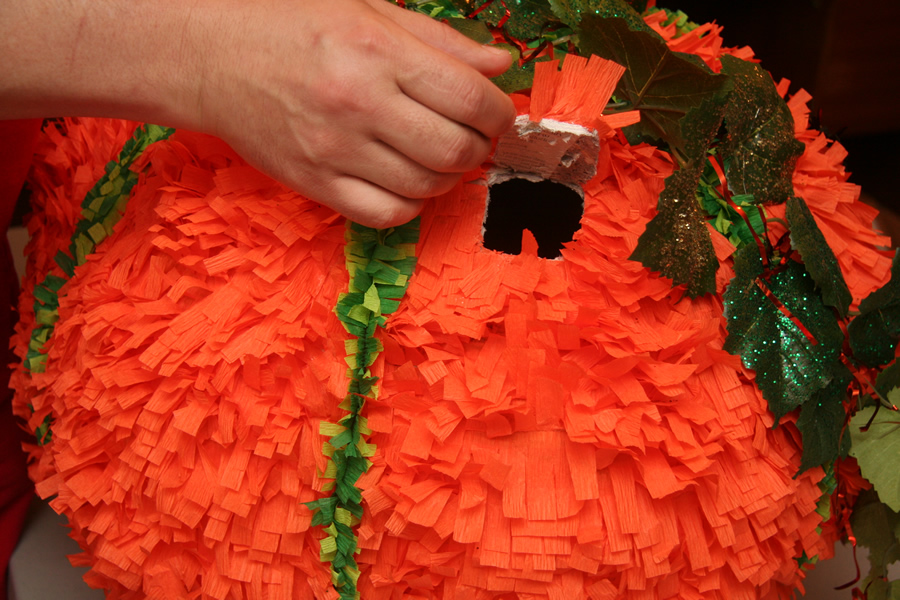
With three sides cut, I used the knife to pry the door open.  This is about as far as you want to go when opening the door — if you open it too far you can break it off.  If that happens, don’t worry — you can usually just put Elmer’s glue around the edges of the opening and lay the door right back down where it belongs.

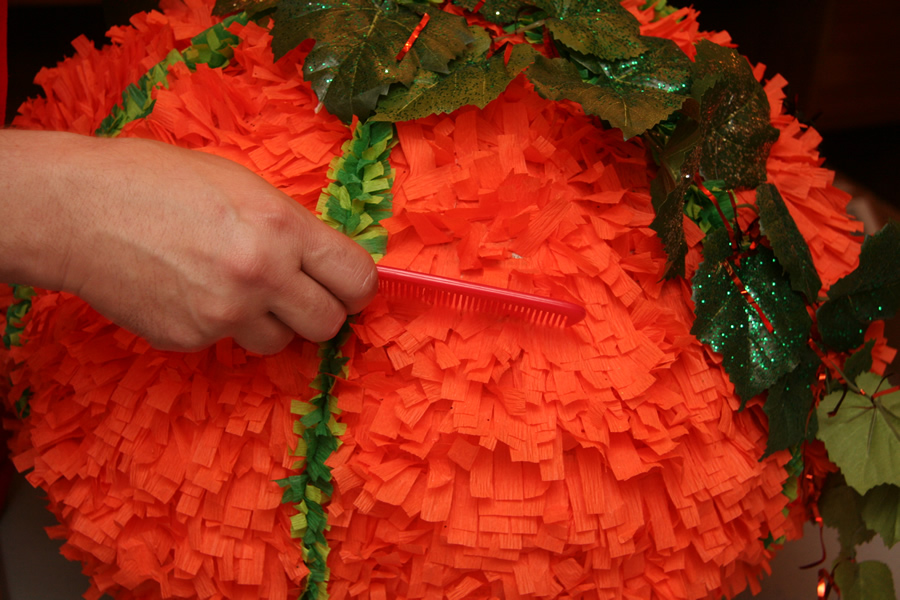
After adding the candy I folded the door back down to close it and then fluffed up the crepe paper with a comb.  When closing the door you want to be careful not to push it into the piñata.  If you push the door too far, you can use the knife blade to pry it back out again so it lays level with the surface.

Door 07   Door 08

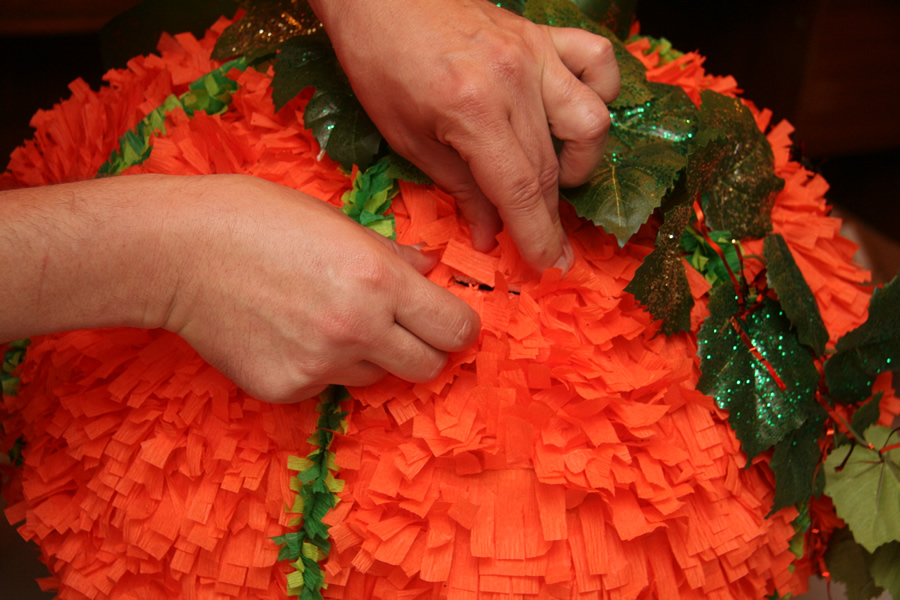
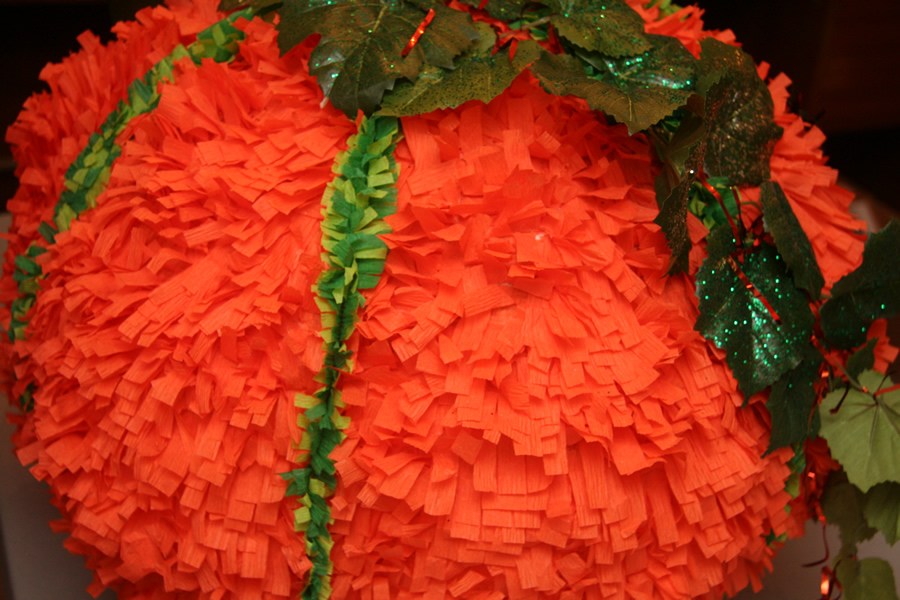
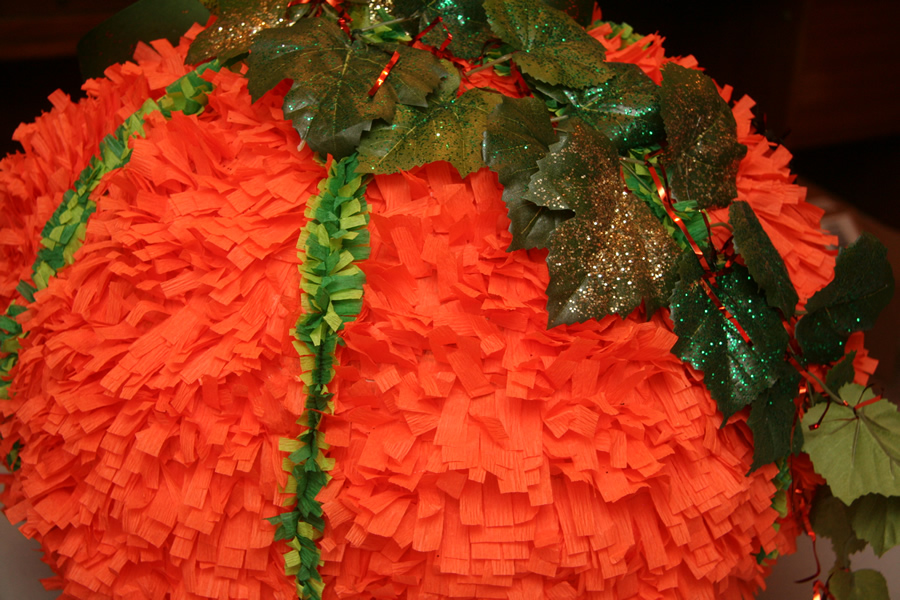
Once the door is folded closed and the crepe paper is fluffed up, the door disappears.  I laid the vines back down over it, and I’m done!

Door 09     Door 10

If you’re using a different technique to decorate your piñata, you may have to make the candy door differently.  In some cases you might need to decorate over the door to hide it.  And sometimes, like when you’re painting your piñata, you’ll either need to add the candy before painting, add some kind of decoration to cover the door, or simply allow the door to show.

<< Decorating with crepe paper
Making a piñata stick >>

Make Your Own

  • Before you start
  • How to make a piñata
  • Working with balloons
  • Working with cardboard
  • Working with papier mâché
  • Adding the hanging hook
  • Decorating your piñata
  • Decorating with crepe paper
  • Cutting the candy opening
  • Making a piñata stick
  • Smashing your piñata
  • Storing your piñata
  • Simple Piñatas
  • Step-by-step instructions
    • Make a Heart
    • Make a Pig
    • Make a Tropical Fish
    • Make a Spider
    • Make a Stegosaurus
    • Make a Zebra
  • Ask a question!
Piñata Boy
All materials © 2025 Piñata Boy. All rights reserved. Web site by Websy Daisy.

MENU
  • Home
  • Gallery
    • Alien
    • Alien Planet
    • Demon Smiley
    • Dolphin
    • Football
    • Ghost and Bat
    • Green Dragon
    • Heart
    • Hello Kitty
    • Jack-o-Lantern
    • Jaguar
    • Jill-o-Lantern
    • Jimmy Kimmel Live
    • Medusa
    • Neopets – Feepit
    • Neopets – Shoyru
    • Parrot
    • Pigasus
    • Pirates of the Caribbean
    • Pokeball
    • Porcupine Pufferfish
    • Princess Ducky
    • Rainbow Zebra
    • Santa Smiley
    • Shark
    • Smaug
    • Tarantula
    • Stegosaurus
    • Tropical Fish
    • Warlord of Nibblecheese
    • Coloring Pages
  • Make Your Own
    • Before you start
    • How to make a piñata
    • Working with balloons
    • Working with cardboard
    • Working with papier mâché
    • Adding the hanging hook
    • Decorating your piñata
    • Decorating with crepe paper
    • Cutting the candy opening
    • Making a piñata stick
    • Smashing your piñata
    • Storing your piñata
    • Simple Piñatas
    • Step-by-step instructions
    • Ask a Question
  • Show Us Yours
  • Blog
  • About